Tayda UV Printing and Drilling: How to Order a Custom Pedal Enclosure
Tayda will drill an enclosure to your layout and UV print your artwork on it, so it turns up ready to build. I’ve just had one back, a pedal I’m calling the 404, and this is how I got from a layout on screen to the enclosure in the photo.
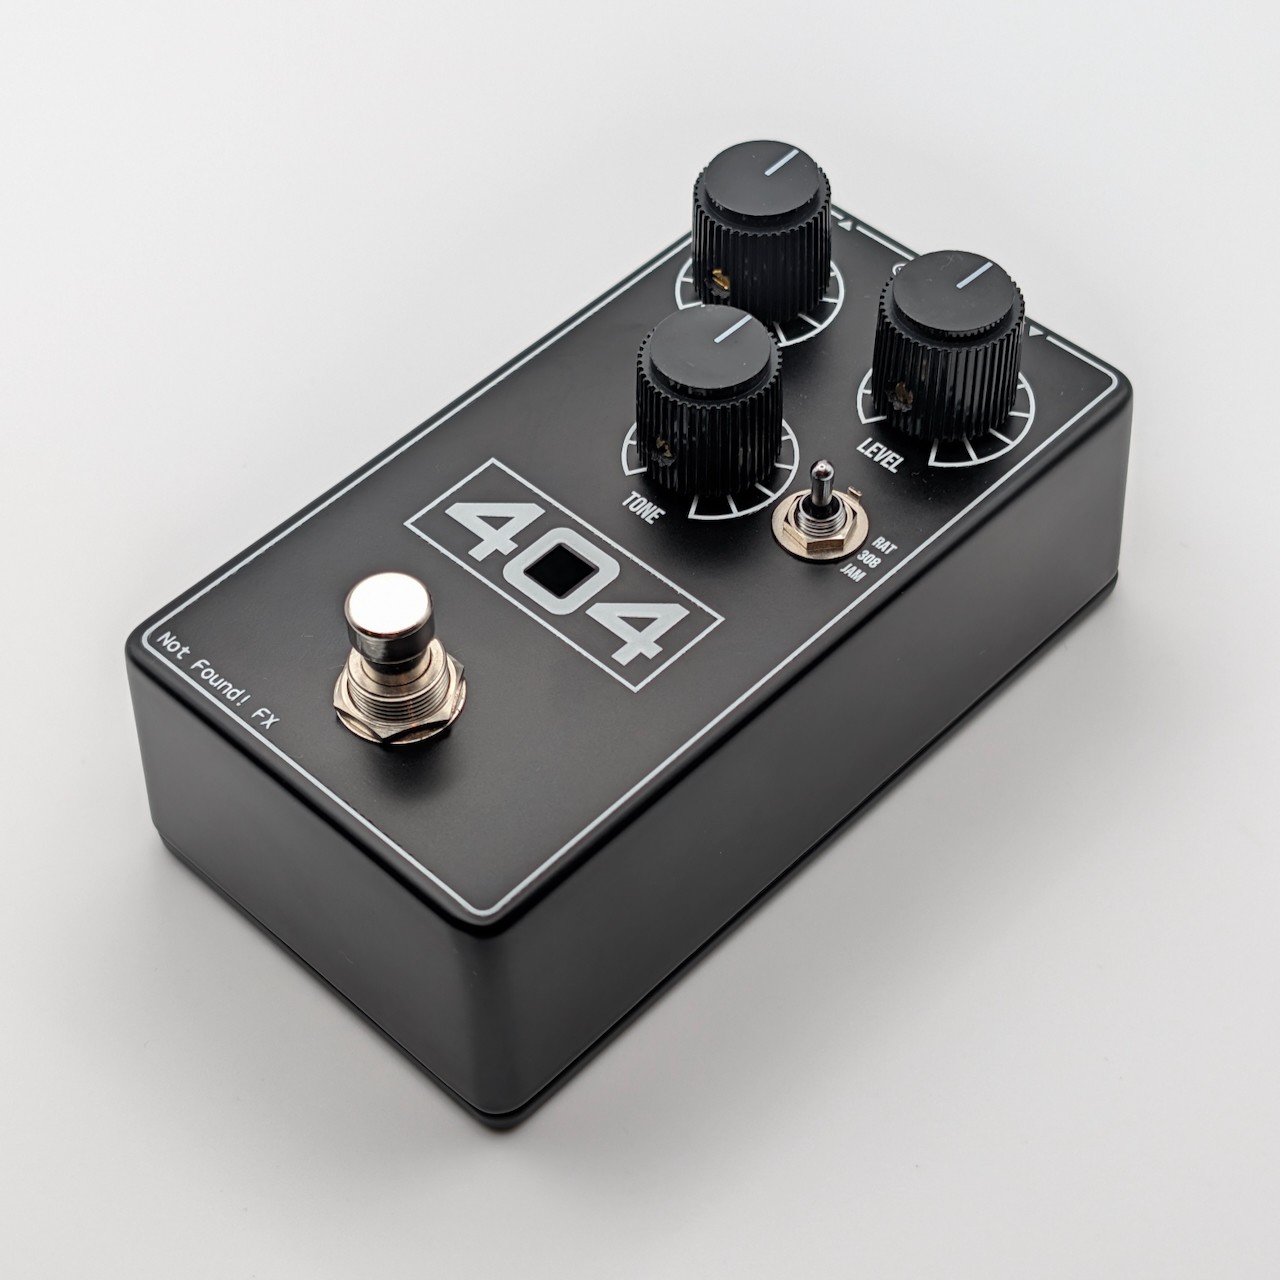
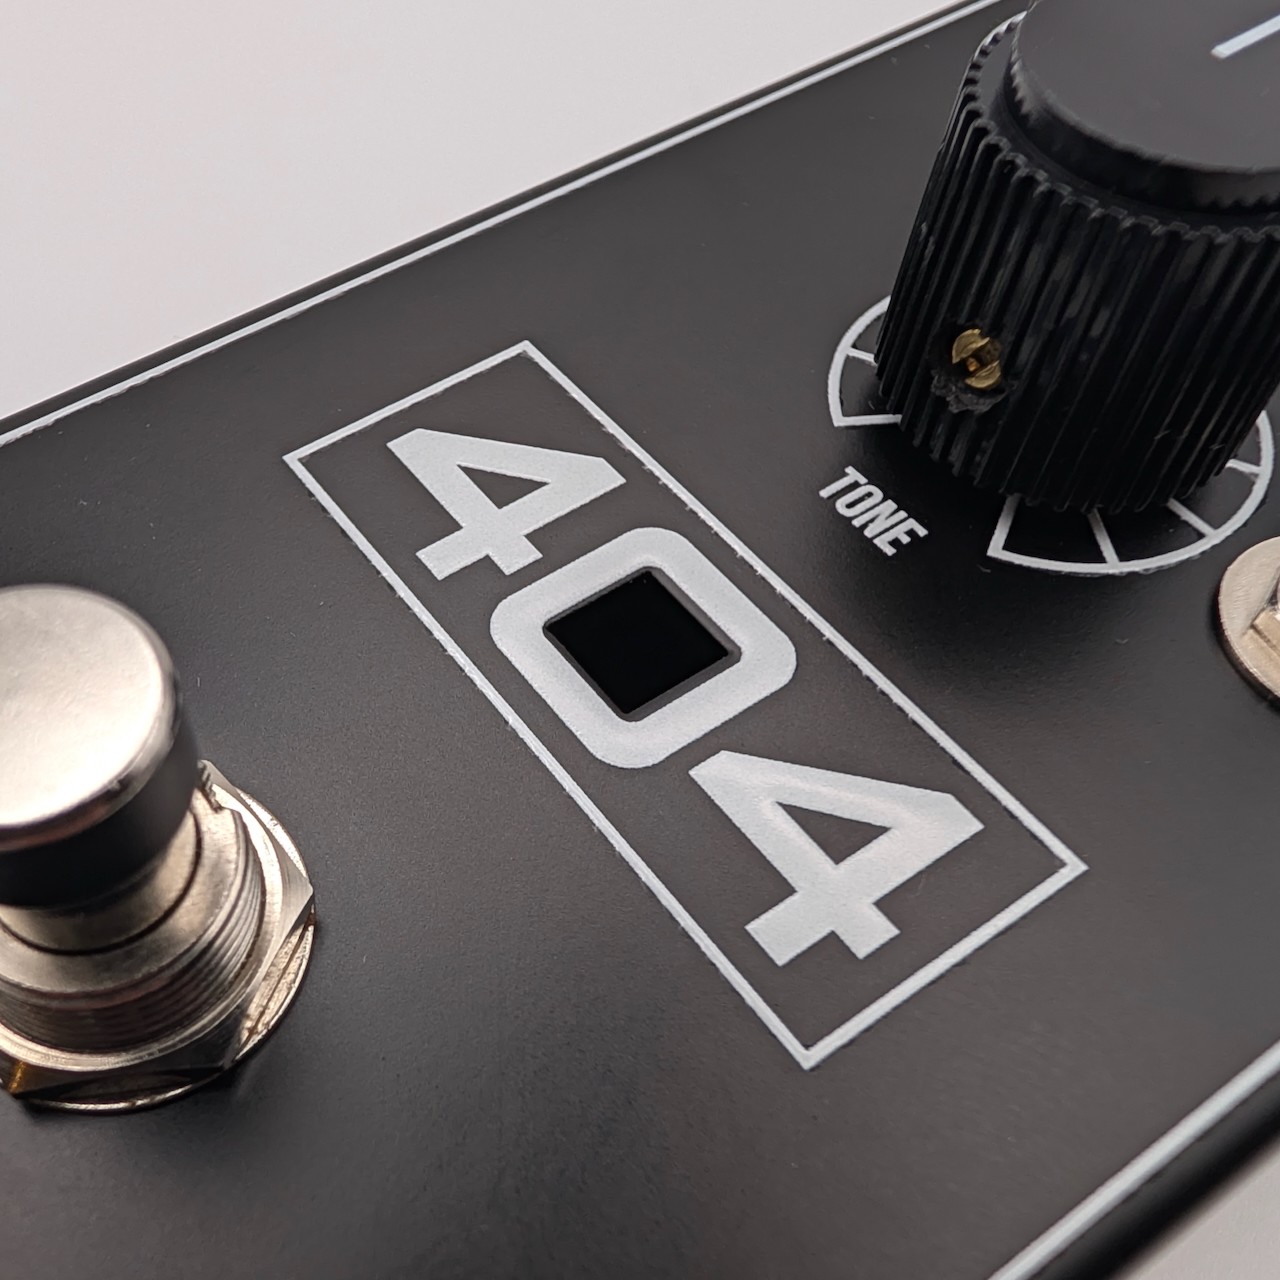
It’s really two jobs: Tayda drill the holes from a drill template and print from a print file. The trick is making both from the same layout, so the artwork lines up with the holes. On the 404 every scale sits evenly round its knob and the LED window lands right in the middle of the “0”.
What you need
- A layout in Stompbox Layout on an enclosure Tayda print: the 125B, 1590A, 1590B, 1590BB, 1590BB2, 1590XX or 1590DD.
- A Tayda account, for their Manufacturing Center, which used to be called the Box Tool.
- The Tayda print file from the app, a one-off $9 that covers every project. The artwork itself is free, so you can design the whole thing first and only pay when you’re ready to order.
Step 1: Lay it out and add the artwork
Place your parts as usual, then select a hole and open the Artwork tab to give it a label or a scale round its knob. The look of everything (ink, typeface, label size, scale style) is set once under Whole face. For a logo, import it as an SVG and switch on Print as artwork. The “404” is just that.
The LED shines through a square window in the “0” rather than a round hole. That’s a rectangle with Cutout switched on, and Tayda cut it like any other hole. Make it a bit smaller than the gap it sits in, so it leaves an even black edge.
Step 2: Make the drill template
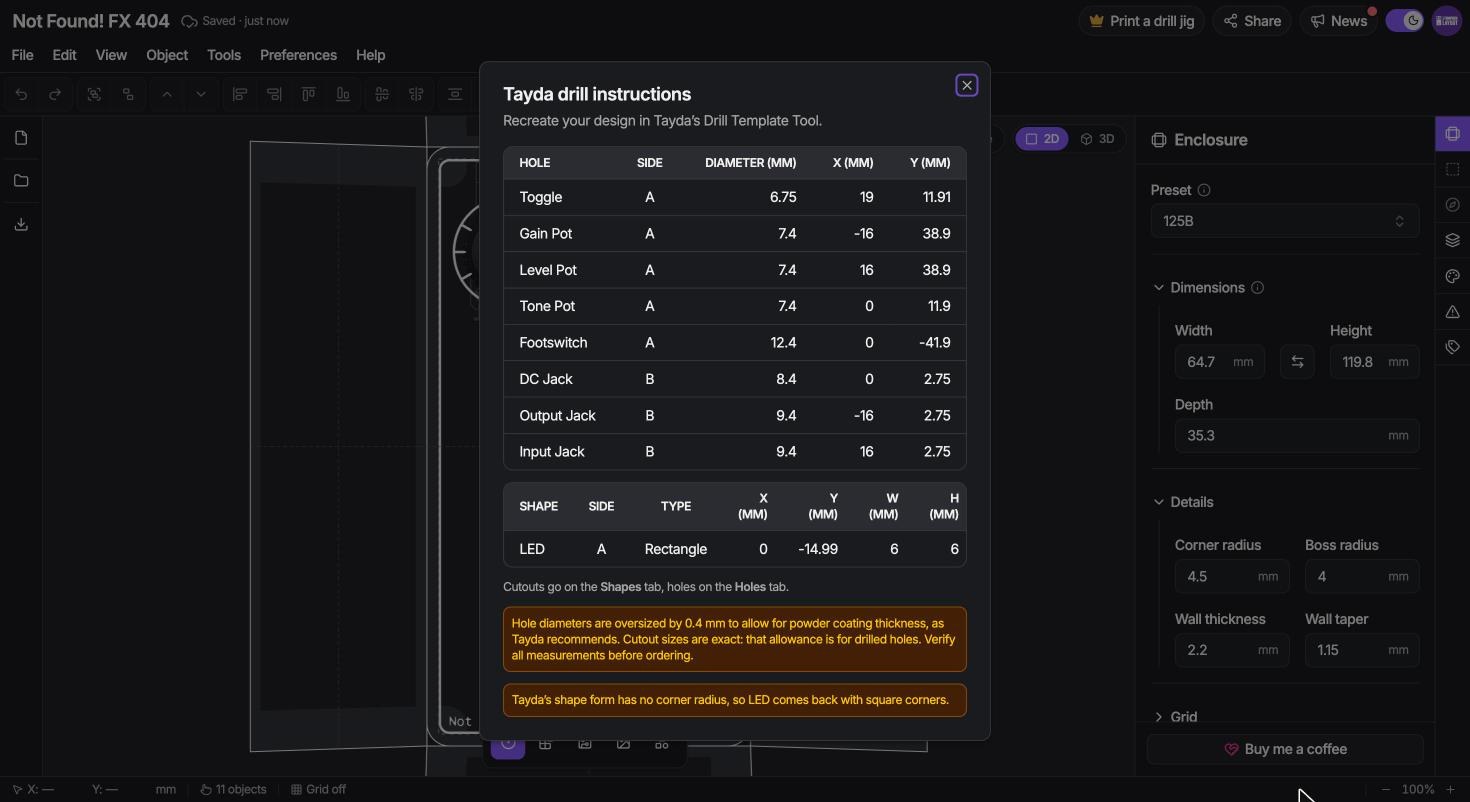
Tools > Tayda drill instructions lists every hole in the format Tayda ask for.
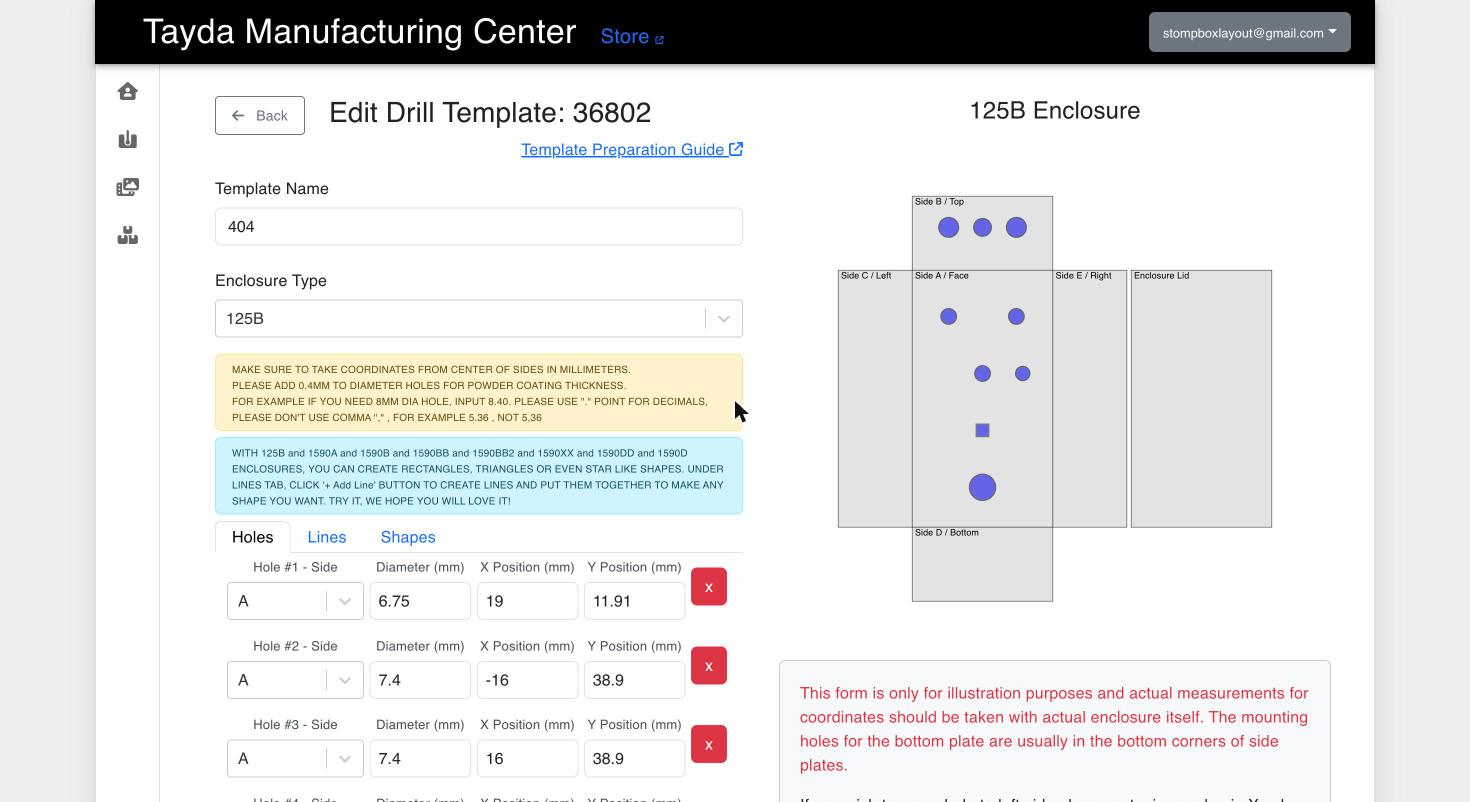
In the Manufacturing Center, start a new drill template, pick your enclosure and copy the holes in. The square window goes on the Shapes tab. The diagram fills in as you type, which is a handy check that nothing has ended up on the wrong face.
Step 3: Download the print file
Open Export and choose Tayda Print. You get a preview and two downloads: the print file, which is what Tayda need, and a design file. The tab also warns you about anything odd, like two labels touching, so give it a quick read.
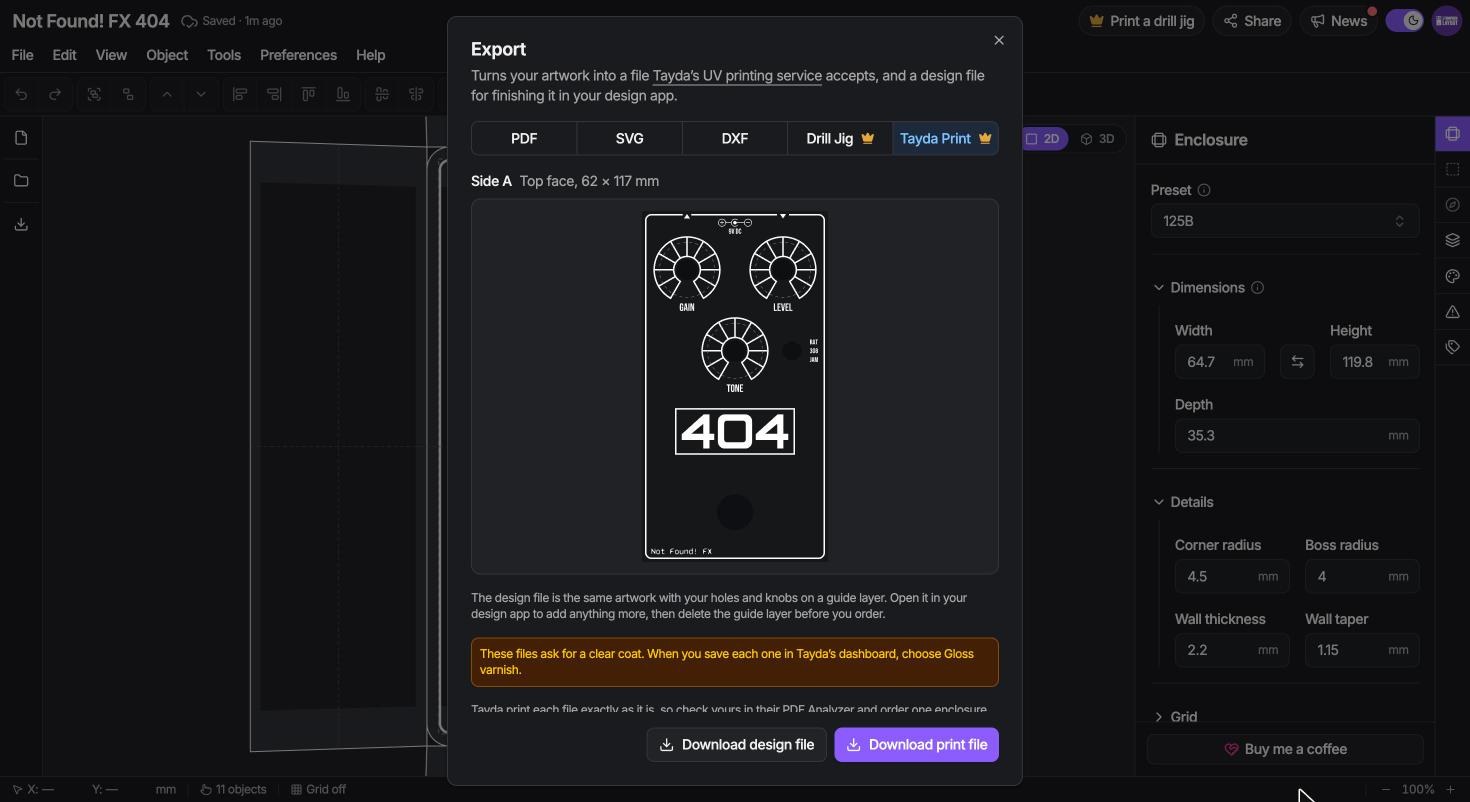
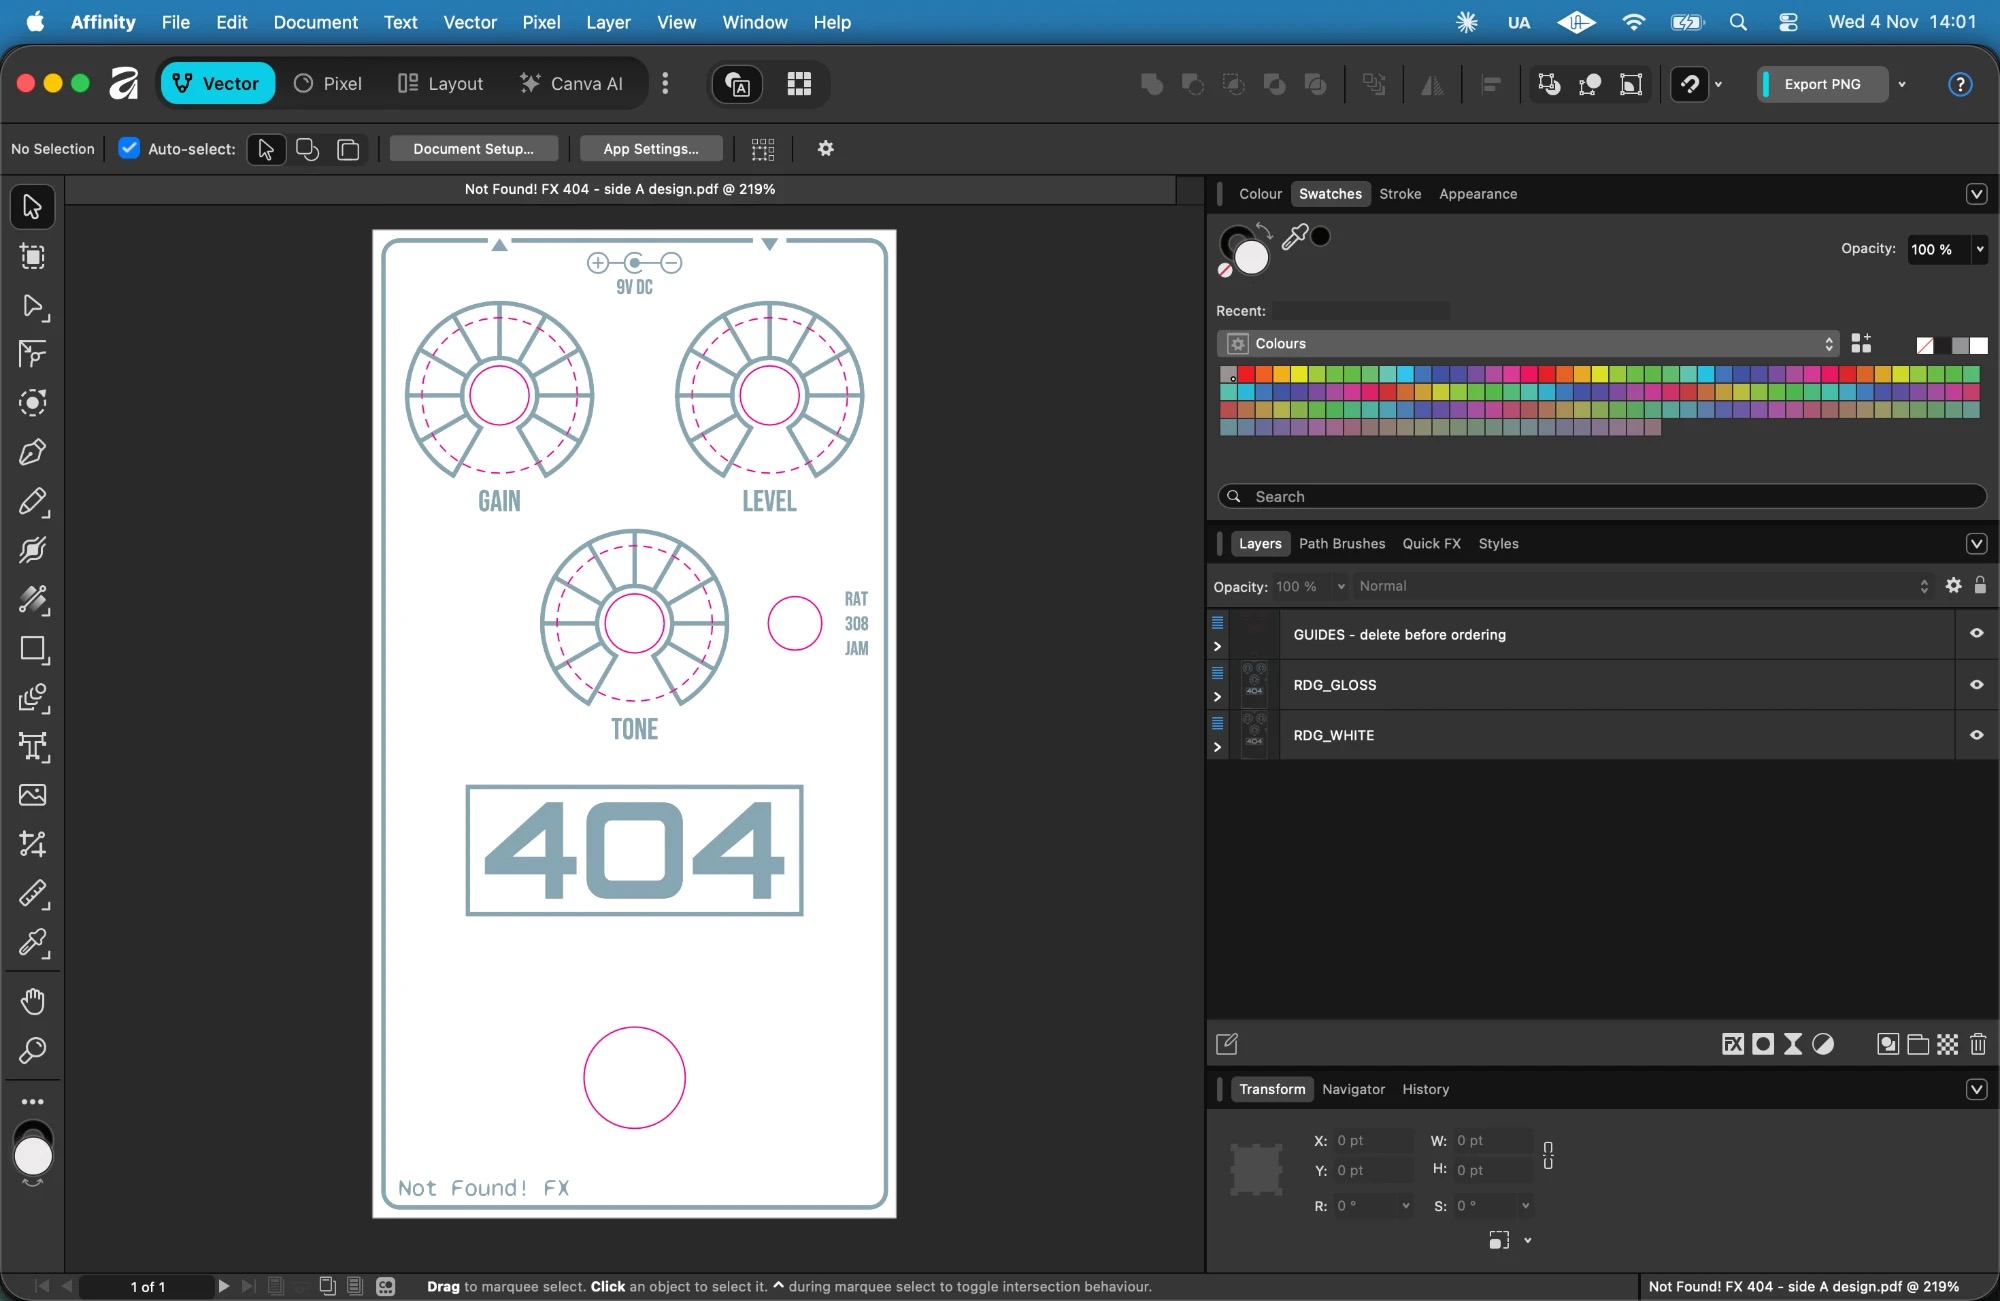
The design file has your holes on a guide layer, in case you want to add anything in a design app first. If you do, delete the guide layer before ordering.
Step 4: Check it in Tayda’s PDF Analyzer
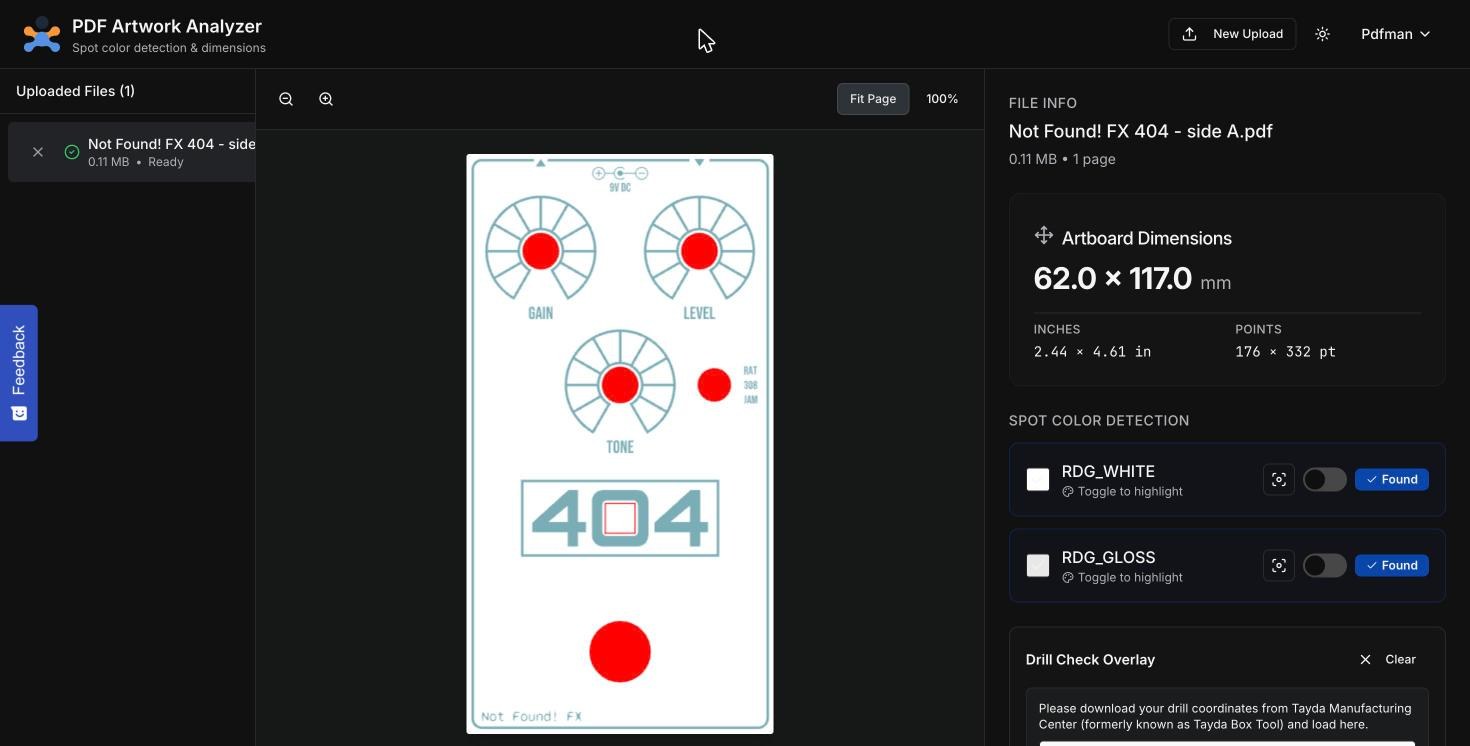
Before you order, run the print file through Tayda’s PDF Analyzer. It tells you whether their printer will accept it, and it can lay your holes over the artwork so you can see everything lines up.
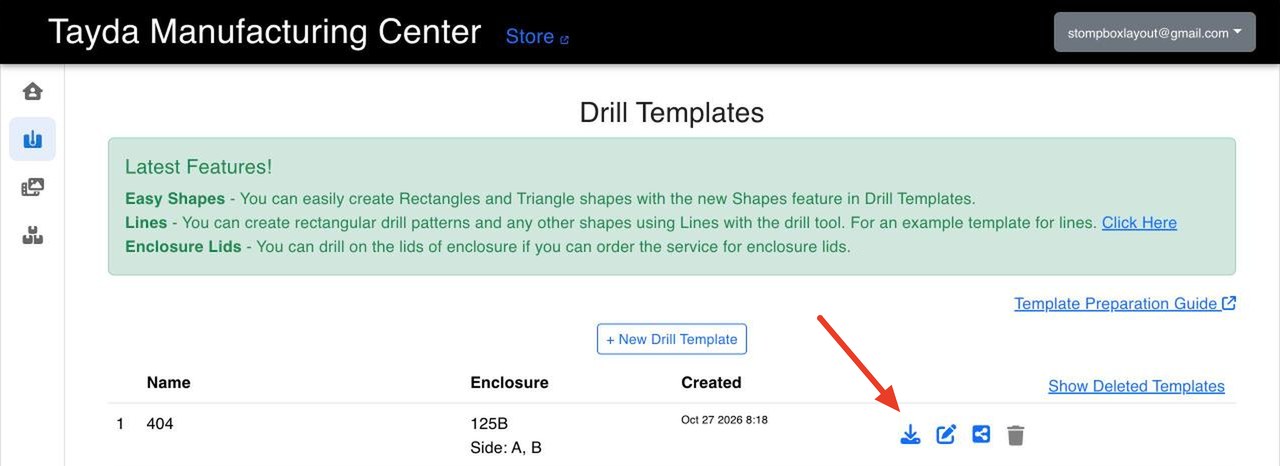
For the holes, go back to Tayda’s Drill Templates page and press the download button beside your template.
Load that file into the Analyzer along with the print file, and check each hole sits where it should before you pay for anything.
Step 5: Order it
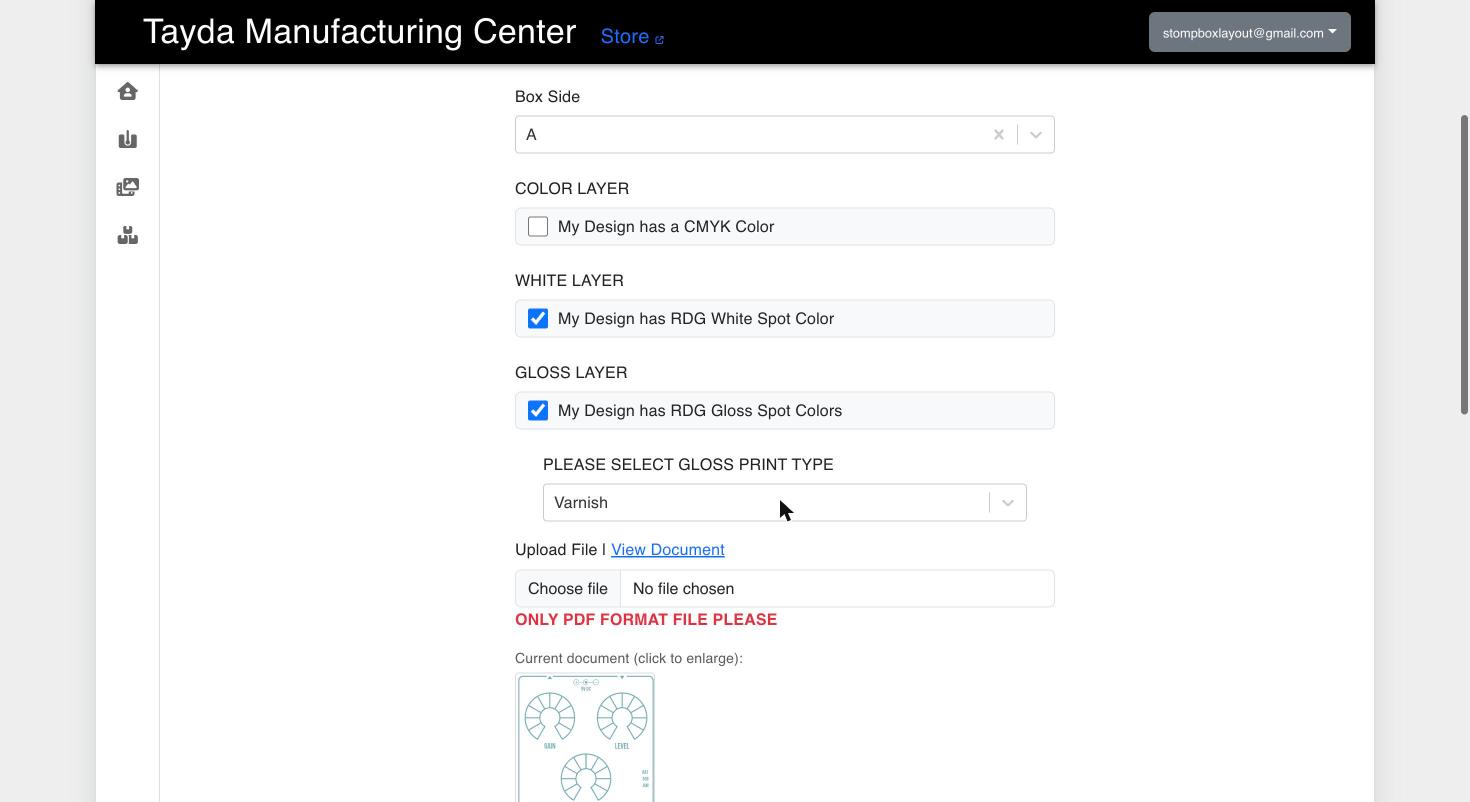
Back in the Manufacturing Center, upload the print file as a UV template and tick the layers it has. If you added a gloss coat in the app, tick that too and choose varnish.
Then make a box job, which is Tayda’s name for the enclosure plus your two templates. Create Order adds the enclosure and all the services to your Tayda cart, and you check out as normal. After that, keep an eye on the Manufacturing Center dashboard: if Tayda have a question about your files they post it there rather than emailing.
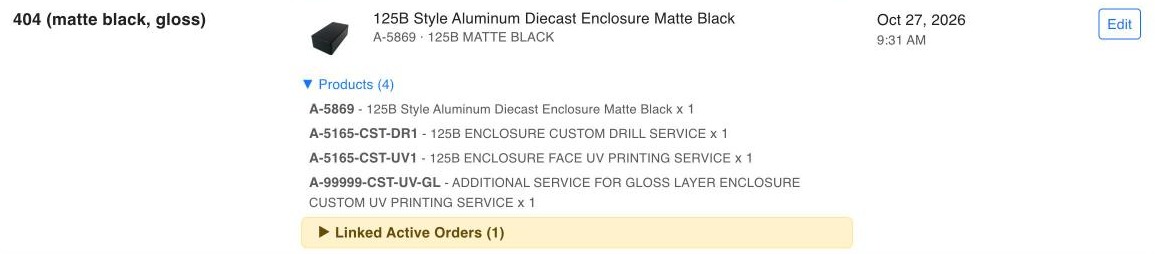
When I ordered, a matte black 125B was $5.99, drilling $4.50 and printing the face $4.00: $14.49 before postage, plus $2 for the gloss. I paid for postage with the import charges included, so there was nothing to pay when it reached me in the UK, eight days later.
What came back
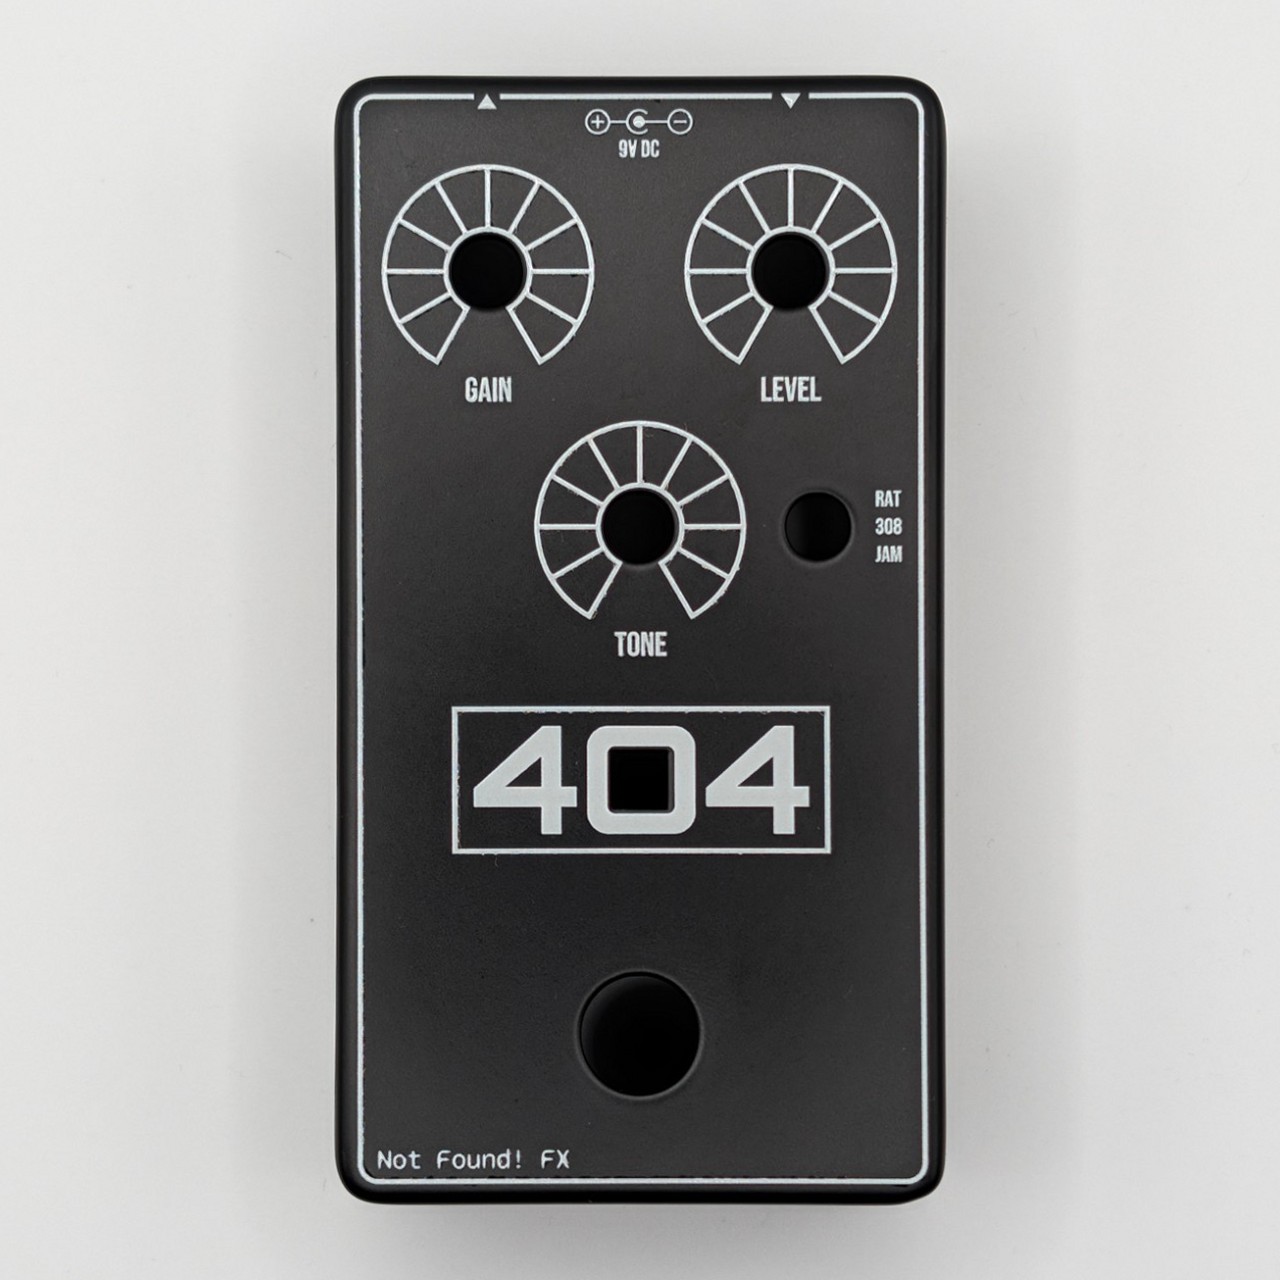
It came out well. The white is crisp and solid, and even the smallest text, the RAT, 308 and JAM by the switch, is easy to read.
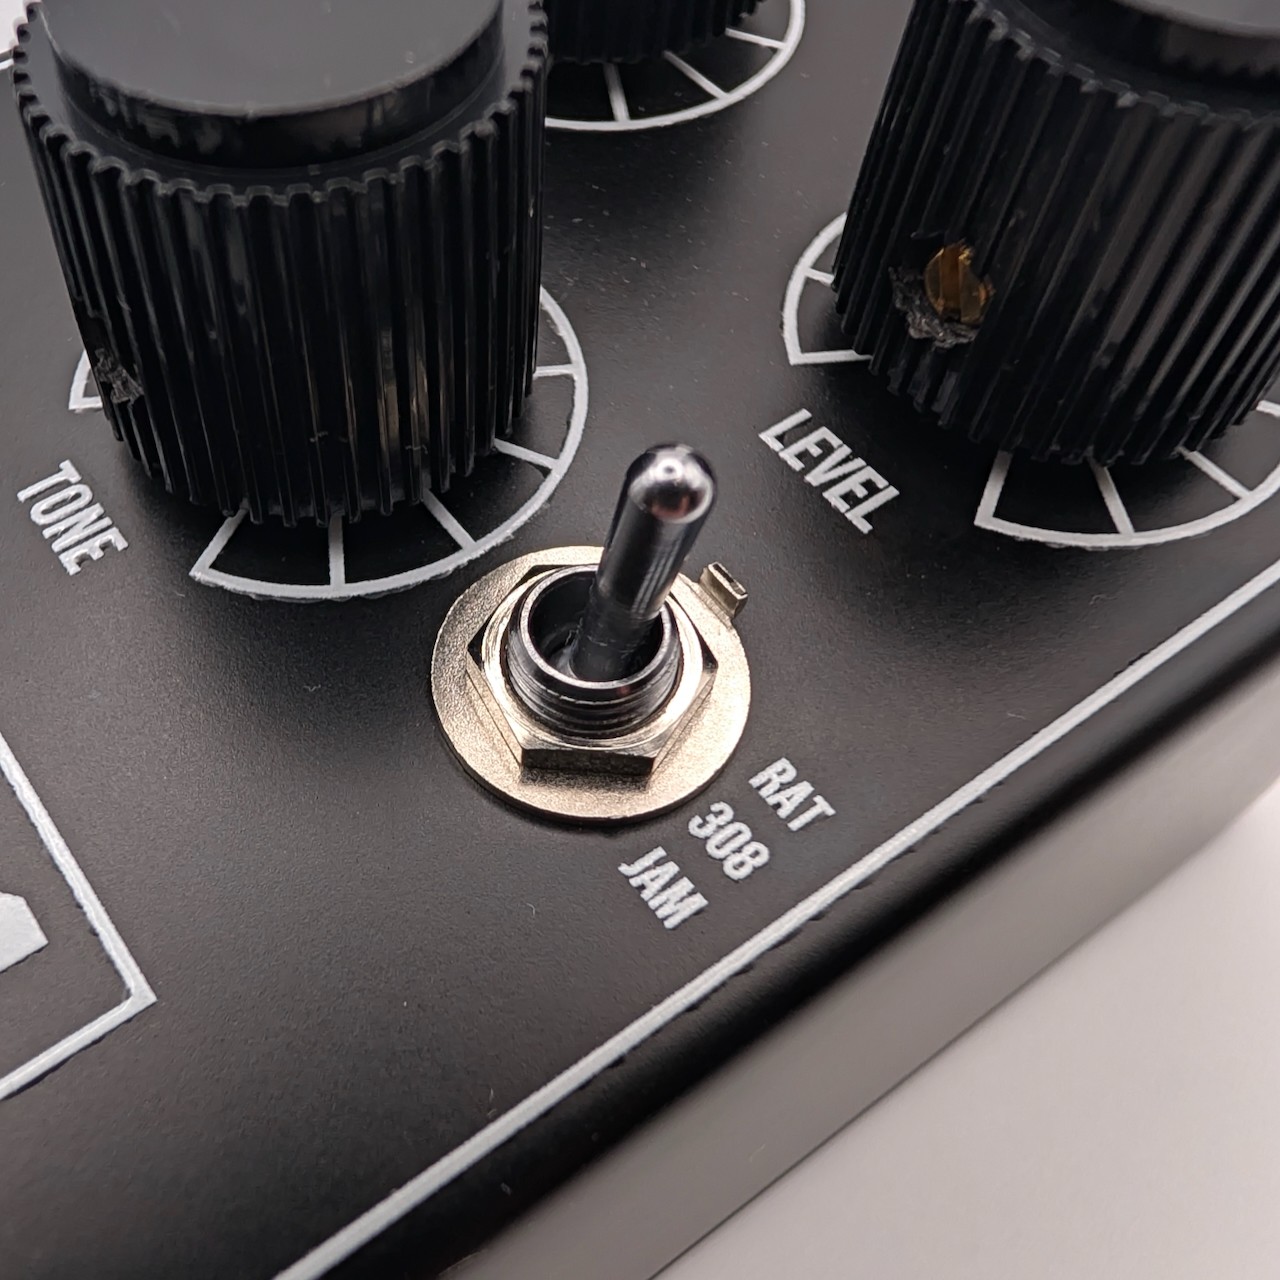
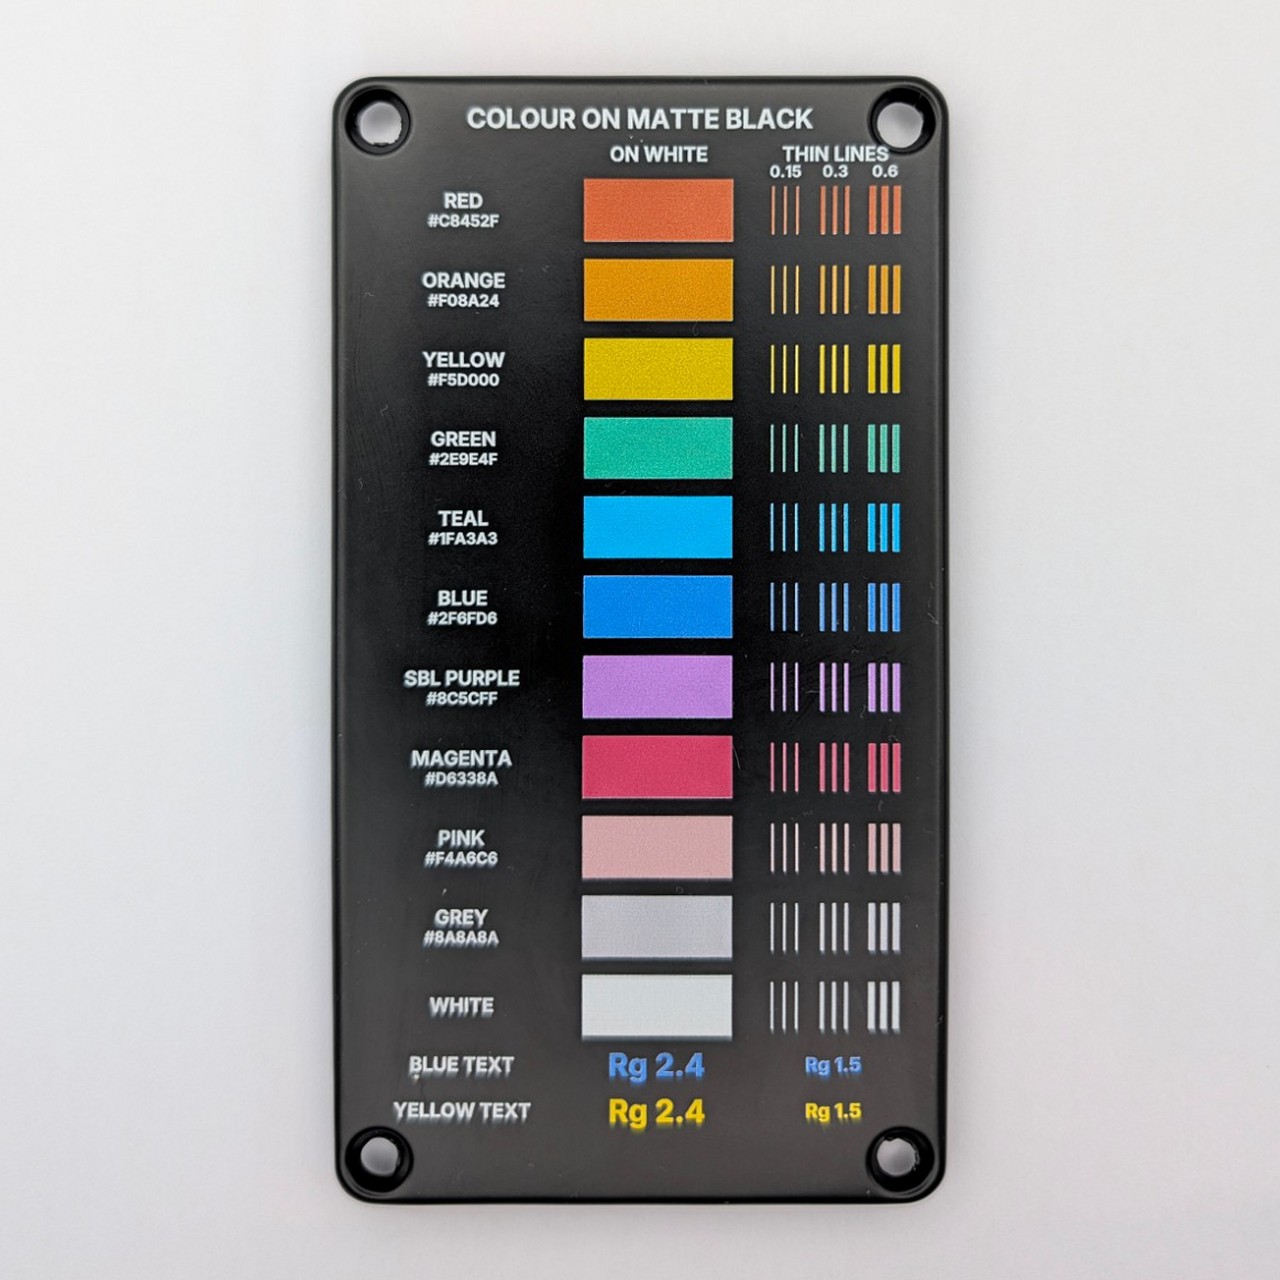
I also had a colour test printed to see how colours come out. They print well, but don’t expect an exact match with your screen: red came out more of a dark orange, while blue and yellow were close. If a colour really matters, test it first.
The one thing I’d change is the gloss. It looks great on the big bold “404”, but on the fine lines of the scales and the border it looks a bit uneven when the light catches it. I wouldn’t bother next time unless the artwork is bold.
If you’re trying it
- Order one first. A print can’t be undone.
- Run the print file through the PDF Analyzer before you pay.
- Make the drill template and the print file from the same layout.
- Treat colours as close, not exact.
- Skip the gloss unless your artwork is bold.
Open Stompbox Layout to start your own, and the user guide has every step in more detail.